


This apple crisp cheesecake is absolutely amazing – creamy cheesecake topped with cinnamon apples, a crumble topping, and caramel sauce! It’s the perfect dessert for Fall or any time of year!

This post may contain affiliate links. I receive a small commission at no cost to you when you make a purchase using our links.
I don’t make big desserts very often for the family. Mostly because there’s only a few of us and a dessert like this cheesecake is a lot more than we need.
But when I do want to make dessert, I want it to be this apple crisp cheesecake.
This is the best cheesecake I have ever had in my life.
It’s amazing. If you love apple desserts and/or cheesecake, you need to make this ASAP.

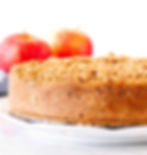
The ultra creamy cheesecake on a graham cracker crust is topped with cinnamon apples, a crumble topping, and then drizzled with caramel sauce.
And the best part is, it’s very easy to make. There are four layers, so there’s a few steps, but they’re all really easy!
Homemade apple crisp cheesecake is definitely worth making. It’s amazing!
What is the best type of apple to use for apple crisp?
The best apples for baked apple desserts are those that hold their shape well when cooked. Apples like Jonagold, Fuji, Granny Smith, Macintosh, Gala, or Honeycrisp are all good choices.
A combination of several different kinds of apples is the best way to go. However, I will admit that I don’t always bother with this – I use what I have, which is usually Gala.
Personally I like a combination of Gala and Granny Smith in my apple desserts, but use your preference!
Making Apple Crisp Cheesecake
This recipe has 4 parts to it: the crust, the cheesecake batter, the cinnamon apples and the crisp topping. Therefore, it does take some time to make. Like any cheesecake recipe, it will need to chill in the fridge for at least 6- 8 hours after its baked. Therefore, I recommend making it the day before you plan to serve.
You’ll first make the crust by combining crushed graham crackers, a little brown sugar and a hint of cinnamon. Then you’ll stir in melted butter to create a something that feels like wet sand. The mixture gets pressed into the bottom and about 1/2 way up the sides of your pan, and then baked on its own for 10 minutes. Baking the crust on its own helps to keep it crunchy and sturdy.
Then as the crust is baking, you can get on with the filling, apples and crisp topping.
I always make the apple mixture and crisp topping first so that they’re ready to go as soon as you have the cheesecake filling done. For the apples, you’ll peal 2 large apples and slice them thinly. Then toss them with brown sugar and cinnamon.
The crisp topping is made with flour, brown sugar, cinnamon, quick oats and melted butter. It should be crumbly and stick together if you squeeze it in your palm. Note that for this recipe, I like smaller crumbles because it makes it easier to slice the cheesecake after its baked. Therefore, I use quick oats instead of old-fashioned oats.
The cheesecake filling itself is very simple and you’ll find familiar if you’ve ever made a baked cheesecake. You’ll beat the cream cheese and sugars until smooth, then mix in a hint of cinnamon and corn starch or flour. From there, mix in the sour cream and vanilla extract. Then mix in the eggs 1 at a time. We’re using a little brown sugar and cinnamon in this recipe to complement the apple topping and add more flavor. The corn starch helps to set the cheesecake and reduces the risk of cracking.
Then its time to assemble the cheesecake. Pour the filling over the crust and smooth the top. Then place the sliced apples in an even layer over the filling. If there’s juice in the bottom of the bowl of apples, do not pour it on top of the cheesecake. Then sprinkle the crisp topping on top of the apples. It will look like a lot, but it really won’t be once the cheesecake is baked.

Note: I tried putting the apples on the bottom, but it made the crust soggy. So I definitely don’t recommend it.
You’ll notice in the photos above that I have the cheesecake pan wrapped in tin foil. That’s because this cheesecake is baked using a water bath. The water bath method helps to keep in moisture to give the cheesecake a silky smooth texture. It also minimizes changes in temperature, which therefore reduces the risk of the cheesecake cracking. Before making the crust, you’ll wrap the outside of a 9-inch (23-cm) springform pan. You need to wrap the pan at least 3 times so that all the seams are covered. The unbaked cheesecake (with the pan wrapped in foil) is placed in a large roasting pan, then about 1/2 – 1 inch of boiling water is poured into the roasting pan. Then the whole thing goes in the oven to bake.

Note: When you bake the crust on its own, you don’t need to bake it in the water bath.
Baking Tips
The cream cheese, sour cream and eggs need to be room temperature before getting started. Make sure to take them out of the fridge at least 30 minutes (ideally 60 minutes) before making the crust.
For people outside of North America, graham crumbs can be substituted with digestive biscuits.
Apples will soften and sweeten as the cheesecake bakes. I recommend using something that’s very crunchy and even a little sour. I typically use Granny Smith because I like the apples a little tart. You could also use a very crunchy Gala or Ambrosia. I do not recommend using McIntosh or Red Delicious.
I used quick oats for the crisp topping, however old-fashioned oats will work too. Do not use instant oats – they behave more like flour and the crisp topping will be too dry.
The cheesecake will need to cool slowly and then chill in the fridge for at least 6-8 hours before serving. Therefore, I recommend baking the cheesecake the day before you plan to serve it and letting it chill in the fridge overnight. Chilling the cheesecake is imperative for it to set properly.
Equipment
stand or hand mixer
aluminum foil or silicone pan cover
large roasting pan (big enough for the springform pan to fit inside)
Apple Pie Filling:
2 ¾ cups apples diced in ½ ich cubes (3 medium apples)
1 Tablespoon melted butter
¼ cup light brown sugar
1 teaspoons cinnamon
¼ teaspoon nutmeg
1 Tablespoon fresh lemon juice
1 ½ Tablespoon corn starch
½ cup of water
Graham Cracker Crust:
2 ¼ cups graham cracker crumbs
¼ cup light brown sugar
1–2 teaspoons cinnamon (to taste)
6 Tablespoons unsalted butter-melted and slightly cooled
Crisp Topping:
½ cup all-purpose flour
½ cup light brown sugar
½ cup quick-cooking oats
1 teaspoon cinnamon
¼ teaspoon nutmeg
¼ cup unsalted butter- melted
Cheesecake Filling:
24 oz. cream cheese
1 cup of sugar
1 ½ teaspoons vanilla
2 Tablespoons flour
4 large eggs

To make the apple pie filling:
Peel the apples and diced in about ½ inches cubes. In a large saucepan melt 1 Tablespoon butter, add chopped apples, brown sugar, fresh lemon juice, corn starch, water, and spices.
Stir everything well, cover with a lid and cook over medium heat until the apples are slightly softened, and the sauce is thickened. It will take about 10-15 minutes, just don’t forget to stir occasionally, or the sauce will stick at the bottom. Set aside and cool before using.
Graham Cracker Crust:
Preheat the oven to 350 F.
In a bowl stir together graham cracker crumbs, cinnamon, and brown sugar. Add melted butter and stir until everything is evenly moistened. Press the mixture in the bottom and up the sides of a 9-inch pie dish. Bake 8 minutes, then set aside to cool.
Crisp Topping:
Stir together flour, oats, brown sugar, and cinnamon. Add melted butter and whisk with a fork to make the crumbs, set aside.
Cheesecake Filling:
Beat softened cream cheese with sugar, vanilla, and flour. Add slightly beaten egg and mix just to combine. Spread the mixture in prebaked crust.
Next spread the apples over the cheesecake layer.
Sprinkle with the crumb topping and bake 35-40 minutes. If it starts browning too much tent the top with aluminum foil.
Cool completely before serving.
Serve with a drizzle of salted caramel or vanilla ice cream or whipped cream.
More fall cheesecake recipes to add to your baking list:

If you made this dish and loved it, please leave a review and comment below. We would greatly appreciate it! Share your dish with us on Instagram, and tag me @gigisflours I’d love to see and share your delicious creation!
Hungry for more? Don't forget to follow me on Social media. You can follow me on Facebook, Instagram, and Pinterest for more pics and recipes. Don't forget if you make this please like, share and tag!
If you Liked this recipe, try some others and tag me!!
Also, There are 20 Recipes in my new e-book on kindle, including this one.
It is Homemade Cheesecakes Cookbook and right now your download is $1.99! Click the link to try it out!